
24 Feb Schedule Stories using Meta Business Suite App
Facebook acquired Instagram in 2012, and yet the two platforms haven’t always played nicely together. Despite being under the same ownership, the social media channels operated independently, which resulted in headaches for marketers who wanted to streamline their content strategy.
Cross-promoting media posts between Facebook’s 2.89 billion monthly active users and Instagram’s 1.074 billion monthly users is part of many businesses’ content marketing strategy, but the process hasn’t been smooth in the past. Many brands relied on third-party tools to accomplish this feat.
Facebook Business Suite is still a fairly recent rollout designed to integrate admin tasks between Instagram and Facebook business pages in one seamless experience. This allows business owners and brands to:
- Manage all comments, direct messages, and notifications in one centralized platform.
- Keep up with policy changes, new guidelines, and terms of service updates.
- Use analytical insights to monitor campaign performance and audience demographics.
- Cross-post on both platforms.
- Manage commerce stores and the ad center.
- Control page settings.
- Strategize content marketing strategies with a calendar to schedule posts and stories ahead of time.
Since its September 2020 release, the platform has taken huge strides toward simplifying content management and executing marketing strategies. Facebook Business Suite is a game-changer for companies and professionals operating on a tight budget, who now have access to all of these tools for free.
#1: Connect Your Instagram Account to Facebook Business Suite
You now have two ways to connect your Instagram account to your Facebook Business Suite: on mobile and desktop. Below, you’ll find a walkthrough for each option.
On Mobile
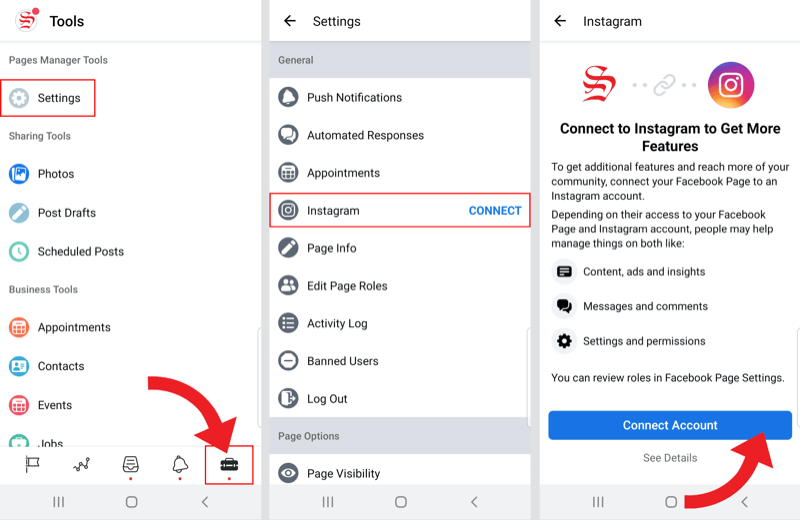
Inside Facebook Business Suite, click the toolbox icon at the bottom of the screen and then select Settings. Within your settings, you’ll find Instagram. Tap Connect.
On the next screen, tap the blue Connect Account button.
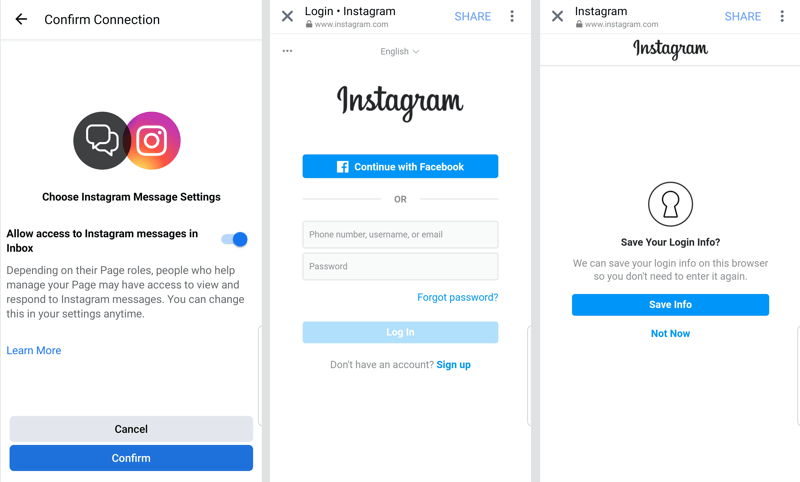
A confirmation screen will appear asking if you want to allow access to Instagram messages in your inbox. You can change this choice later in your settings if you need to.
Once you confirm, you’ll be prompted to either continue with Facebook or log into Instagram with your username and password.
After logging in, you’ll likely be asked if you want to save your login info. Select either Save Info or Not Now to continue.
Next, choose your Facebook account or log into a different Facebook account to complete the setup.
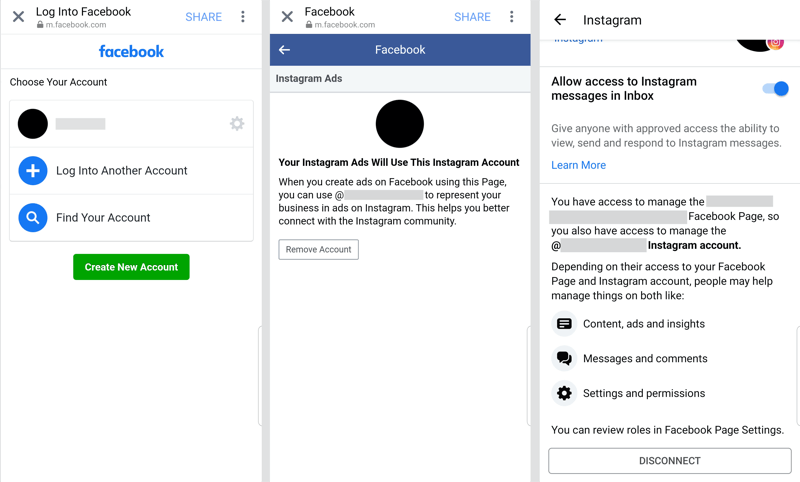
Now when you access your Instagram settings in Facebook Business Suite, you can update your preferences or disconnect the account.
On Desktop
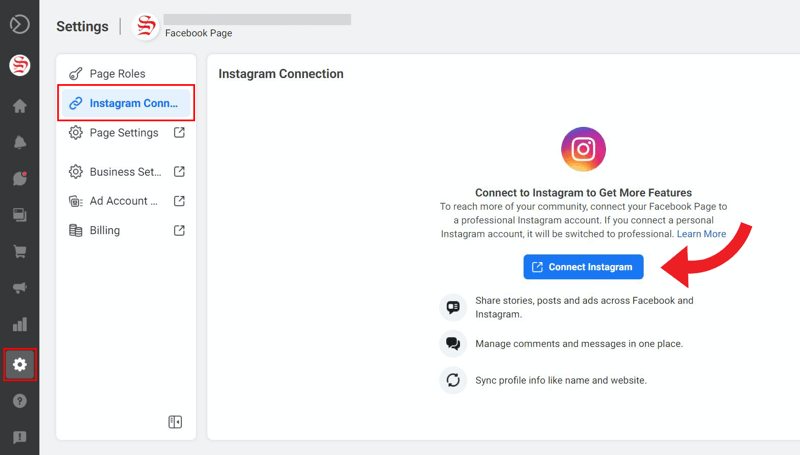
Inside Facebook Business Suite on desktop, click on the Settings icon in the toolbar along the left side of the screen.
Choose Instagram Connection, then click the blue Connect Instagram button.
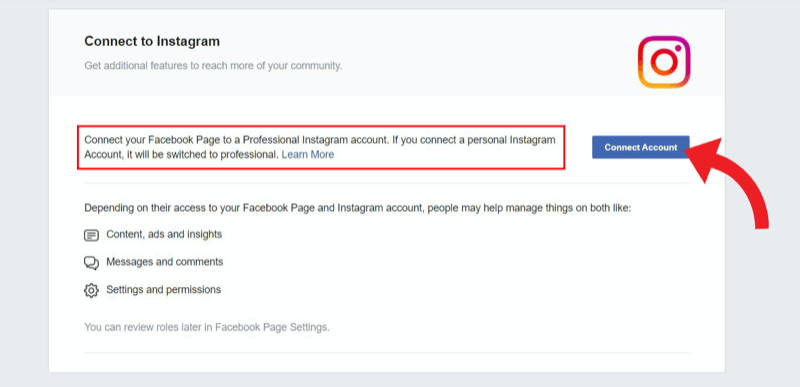
On the next screen, you’ll see a warning that if your Instagram account is personal, it’ll be converted to a professional account. Click Connect Account.
Before you can connect, a box will pop up asking if you want to allow access to Instagram messages in your inbox. You can always change this option in your settings later.
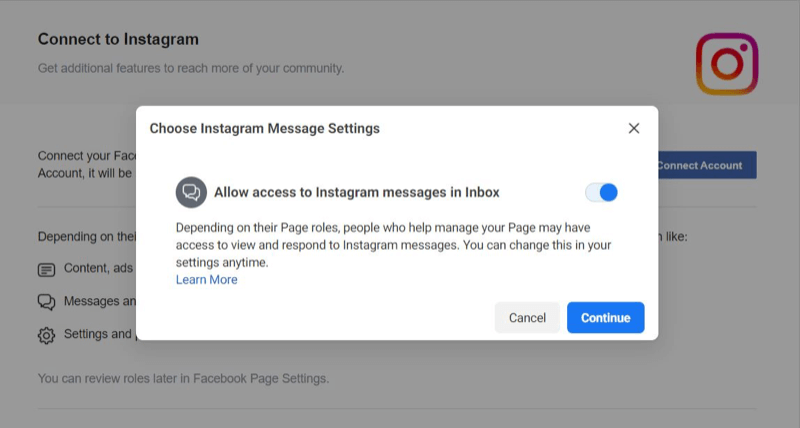
Once you click Continue, you’ll be prompted to complete the connection. If you’re already logged into Instagram on your desktop, your account should show up automatically to select. If that isn’t the account you want to connect, click Switch Accounts.
Now enter your login information. You’ll need to enter a security code if you have two-factor authentication activated.
#2: Create and Schedule Instagram Feed Posts With Facebook Business Suite
Facebook Business Suite offers a ton of helpful tools for managing both your Instagram and Facebook pages. This article will focus on the Posts & Stories feature.
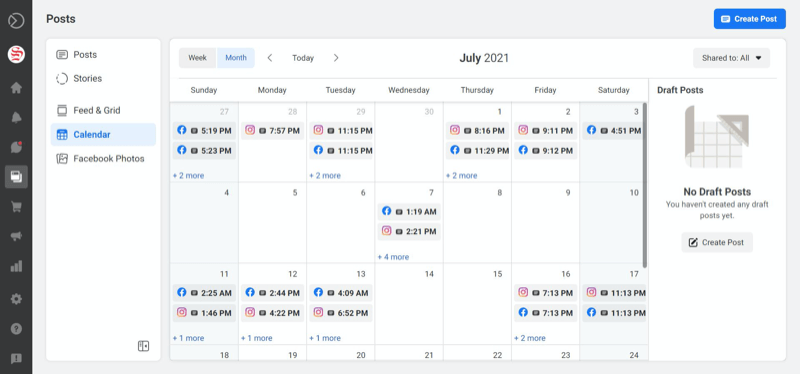
You’ll find Posts & Stories in the toolbar on the left side of your screen. Once you click it, you’ll be taken to the Posts page—although you can toggle between posts and stories easily at the top of the page.
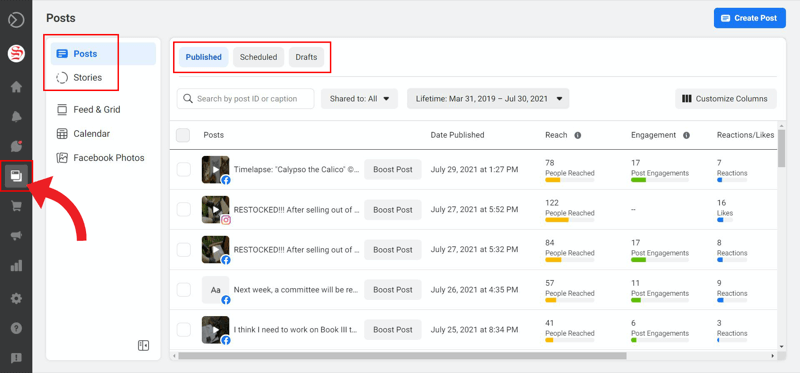
You can also see your published posts, scheduled posts, and drafts, as well as basic engagement analytics for your published posts on both Facebook and Instagram.
Create an Instagram Feed Post in Business Suite
In the Published section of Facebook Business Suite, you can create a new feed post for Instagram, Facebook, or both.
Start by clicking the blue Create Post button in the top-right corner.
Inside the new window, check the boxes for Facebook and/or Instagram, depending on where you want to post.
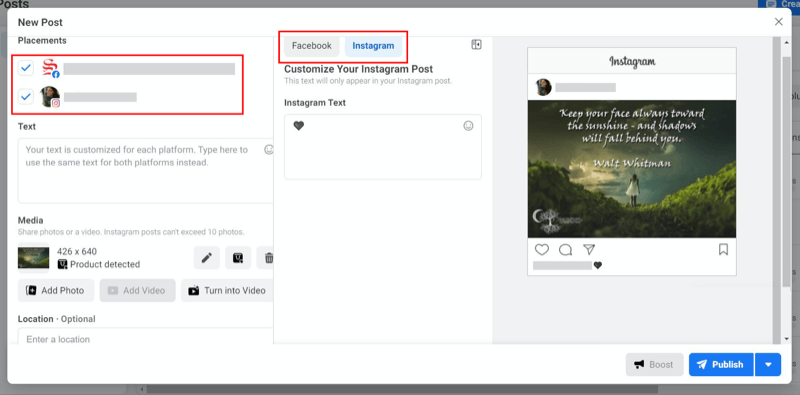
You can choose to add text for both platforms in the box on the left, or toggle between your Facebook and Instagram posts to customize the text for each one in a secondary text box located in the middle. This is a huge benefit that Facebook Business Suite hasn’t always offered. Now you can put your hashtags and @mentions on your Instagram post without cluttering up your Facebook post.
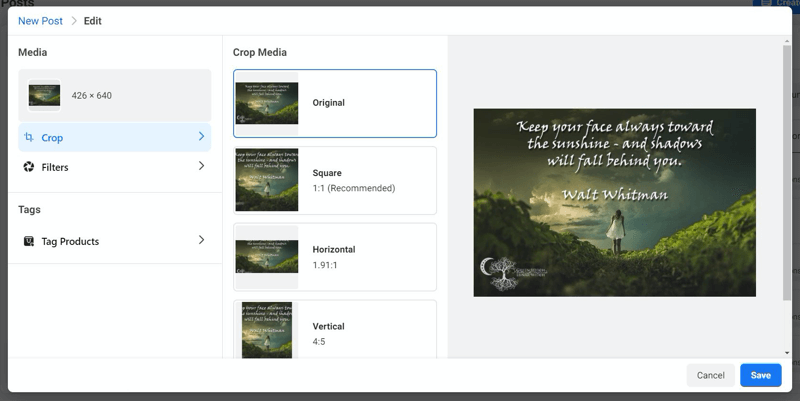
When you upload your media, Facebook Business Suite allows you to tag products and make edits, including adding filters. Reminder: Instagram carousels can handle up to 10 photos or videos.
If you want, you can also add your location. This step is optional but it can help expand the reach of your posts.
When you’re ready, click Publish.
Schedule an Instagram Feed Post in Business Suite
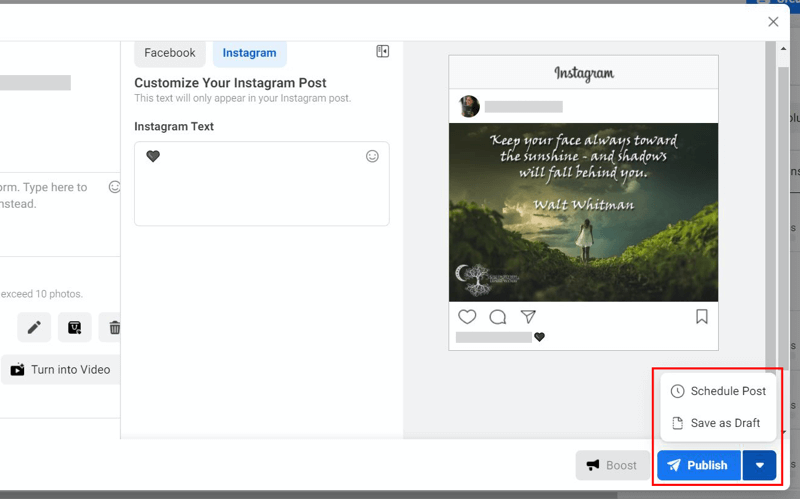
If you’ve created a post and then decided you’d rather schedule it for later, click the small arrow next to the Publish button. This will allow you to schedule your Instagram post or save it as a draft and come back to it later.
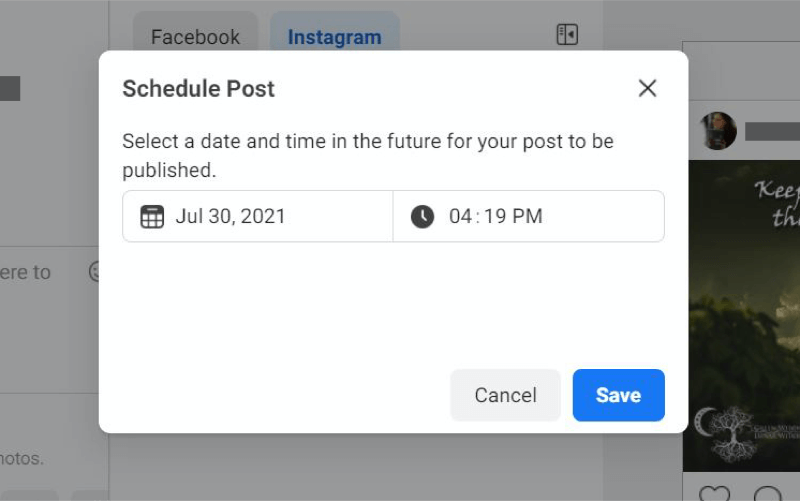
If you clicked Schedule Post, a small window appears so you can select the date and time your post will be published.
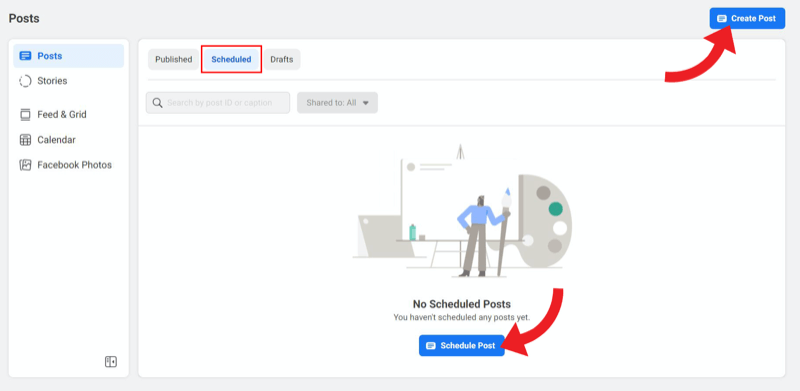
Alternatively, if you know ahead of time that you’re going to schedule your Instagram post, you can start in the Scheduled section, rather than the Published section.
Either option here—Create Post or Schedule Post—will open the same new post page but start with the scheduling date and time right off the bat.
Reschedule an Instagram Feed Post in Business Suite
After you’ve scheduled a post, you’ll see it in the Scheduled section (once you refresh the page).
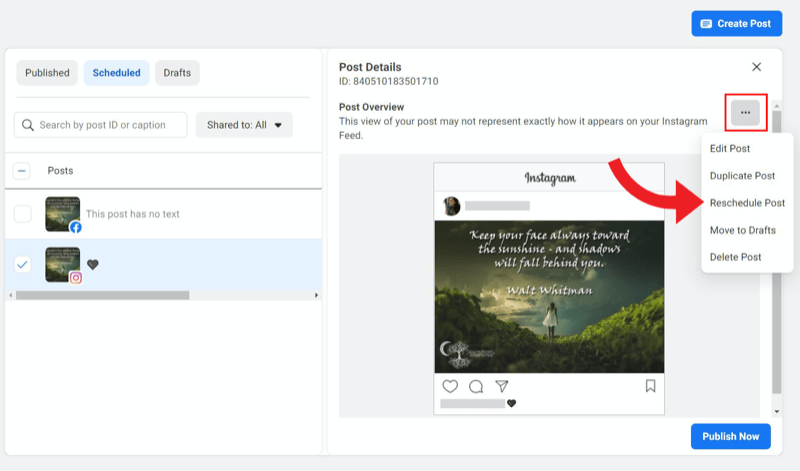
To reschedule the Instagram feed post for a different date and time, select the post you want to reschedule. A preview will appear with post details and a basic overview.
Click the ellipsis (…) button next to the post overview to open the drop-down menu with more options. Select Reschedule Post.
Change the date and time and then click Reschedule.
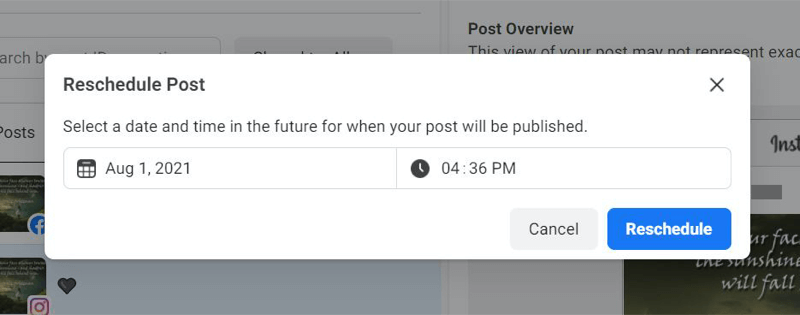
You should see a message at the bottom of the screen saying that your post has been scheduled to confirm that the change was successful.
Delete a Scheduled Instagram Feed Post in Business Suite
You can delete your scheduled Instagram feed post using the same drop-down option menu you used to reschedule.
In the Scheduled section, select the post you want to delete. Then click the ellipsis (…) next to the post overview to open the options drop-down menu.
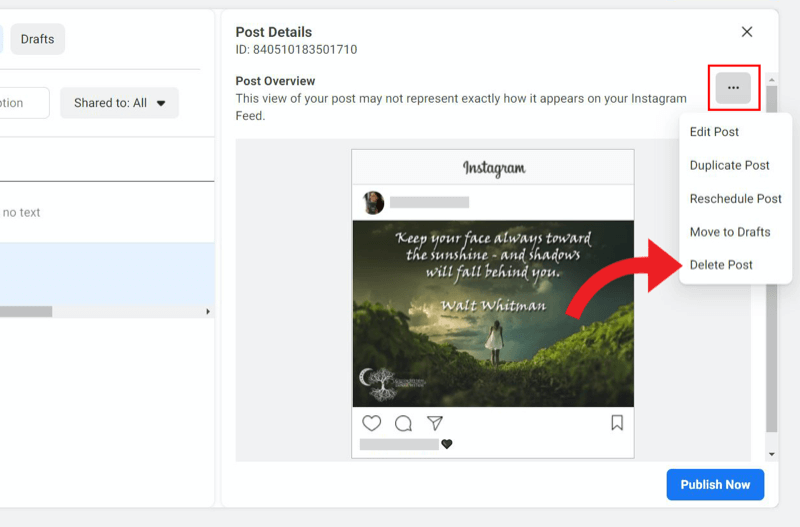
Click Delete Post. Facebook Business Suite will ask you if you’re sure you want to delete this post, as this action is permanent. If you’re sure, click Delete.
#3: Create and Schedule Instagram Stories With Facebook Business Suite
The new addition of being able to schedule stories is huge. Scheduling Instagram stories is a primary reason many brands invested in third-party tools, and now you can do it for free.
Reminder: You’ll still be working in the same Post & Stories section inside Facebook Business Suite. You can navigate there by using the vertical toolbar on the left side of your screen.
At the top, click Stories this time, instead of Posts.
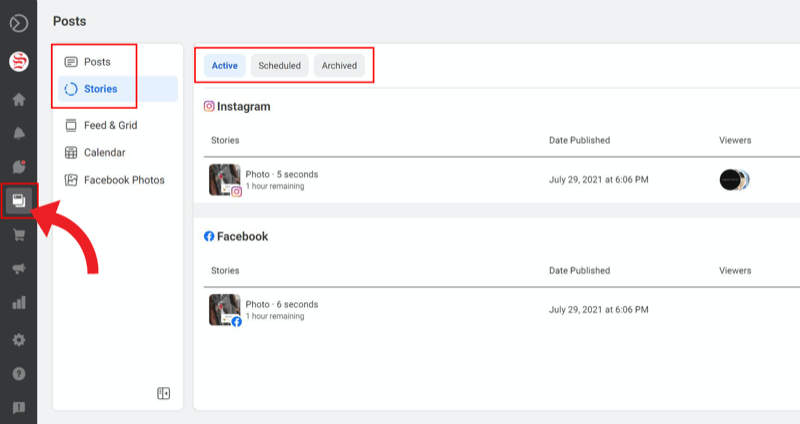
You can click through your active, scheduled, and archived stories across the top of the page.
Create an Instagram Story in Business Suite
Just like with feed posts, Facebook Business Suite lets you create a story for Instagram, Facebook, or both, depending on where you want to post.
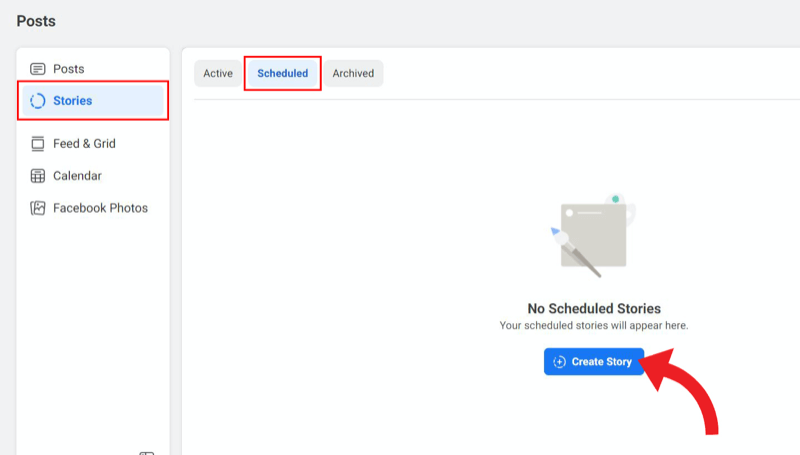
To create a new story, start by navigating to the Scheduled tab.
Click the blue Create Story button.
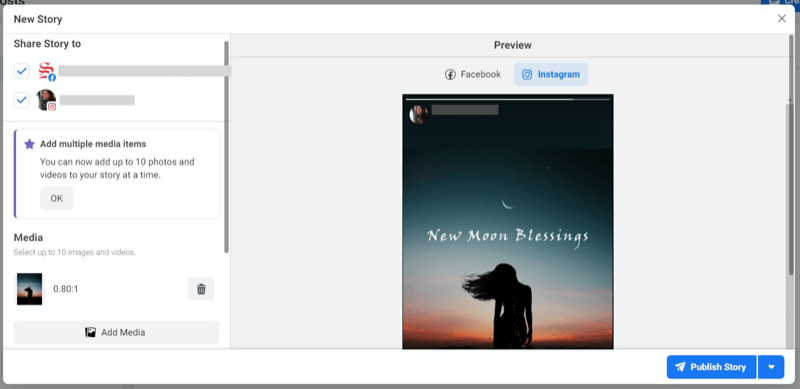
On the next screen, you can control which platform you want your story to be featured on by checking or unchecking the boxes for Instagram and Facebook.
Next, upload your media. You can add up to 10 photos and videos to your story at a time.
At this time, the creative tools available include crop, text, and stickers. While editing your media is more limited than within Instagram’s native app, Facebook Business Suite has been rolling out features and improvements over the last few months and will likely continue to enhance these options in the near future.

Once you’re ready, click Publish Story.
Schedule an Instagram Story in Business Suite
If you’re opting to schedule your story rather than publishing it immediately, you can do so by clicking the small arrow next to the Publish button. This will bring up the scheduling option.
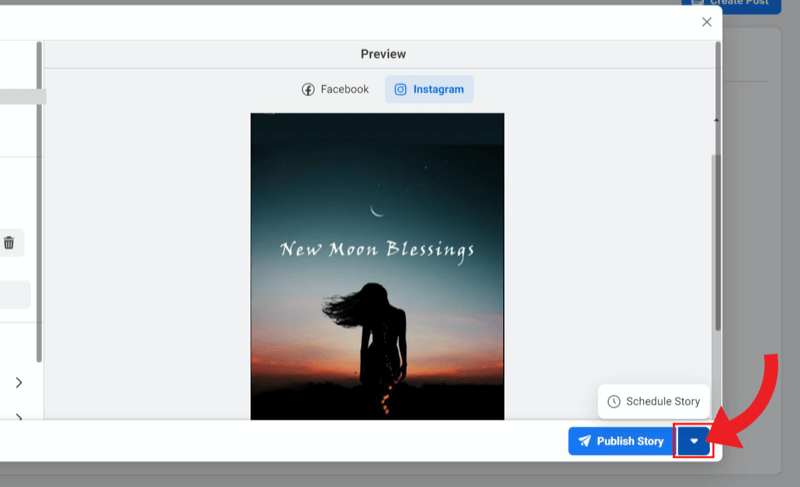
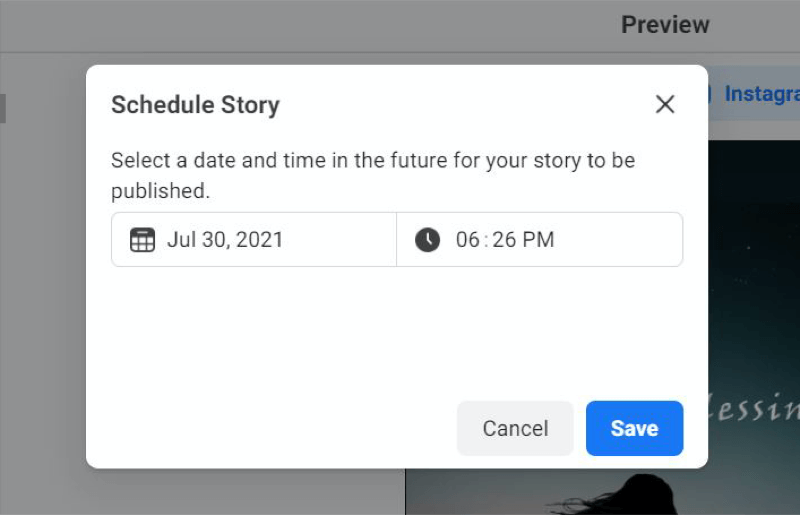
Once you click Schedule Story, a small window will pop up with the date and time selection for you to edit. Click Save to continue.
This will take you back to the Create Story page, where you’ll notice that the blue Publish Story button has now changed to Schedule Story. When everything looks good, click the button to finish scheduling your Instagram and/or Facebook story.
Reschedule an Instagram Story in Business Suite
Once you refresh the page in the Posts & Stories > Stories > Scheduled section, you’ll see the new story waiting to be published at its scheduled date and time.
To reschedule the Instagram story for a different date and time, click on the story you want to reschedule. Unlike your feed posts, you won’t see a checkbox, so click directly on the story itself to bring up a preview on the right with story details and a basic overview.
Click the ellipsis (…) button next to the story overview to access more options via a drop-down menu.
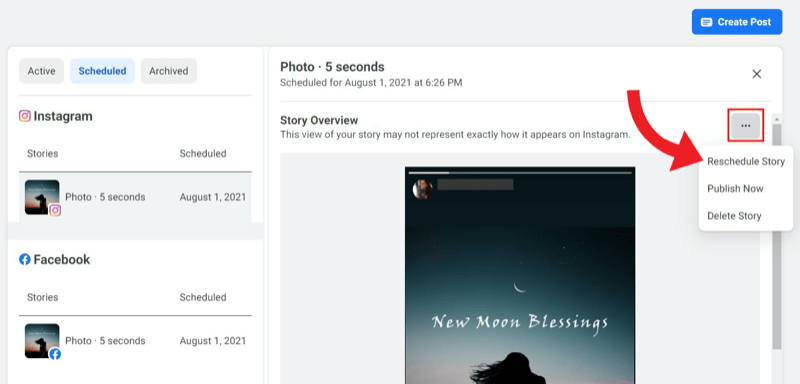
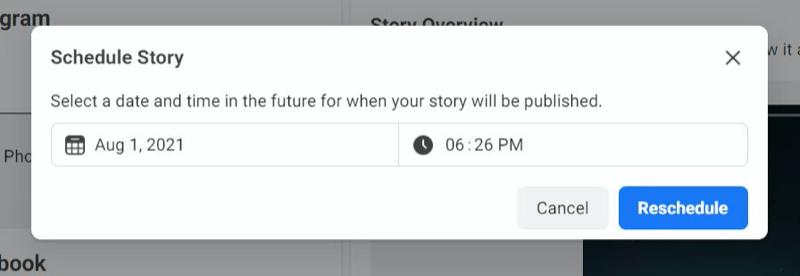
Select Reschedule Story. Then adjust the date and time and click Reschedule.
The pop-up will disappear and the screen will return to the regular Scheduled section with your pending stories. You should see a message at the bottom of the screen that your story has been scheduled.
Delete a Scheduled Instagram Story in Facebook Business Suite
If you want to delete your scheduled Instagram story, you can do so using the same drop-down option menu you used to reschedule.
In the Scheduled section, select the story you want to delete.
Then click the ellipsis (…) button next to the post overview to access the drop-down menu.
Click Delete Story.
A message will then pop up asking if you’re sure you want to delete your content, as this action can’t be undone. If you’re sure, click Delete.
Conclusion
Scheduling Instagram stories used to be impossible, even through paid third-party apps. Facebook’s decision to make this feature accessible in Business Suite has been met with resounding applause from marketers and business owners alike.
In previous versions, there was only one text box available, which made the option of scheduling both Facebook and Instagram posts at the same time hard to pull off. Trying to tag and @mention other accounts for two separate platforms in the same text block was a nightmare, and while hashtags were a must for Instagram, they just never took off on Facebook.
That led users to schedule their Instagram and Facebook posts separately to accommodate for tags, mentions, and hashtags, which defeated the purpose of streamlining activity.
With Business Suite, you now have free access to the new evolution of cross-marketing from a centralized platform.
Sorry, the comment form is closed at this time.